If you have ever dealt with lower back pain, you know it is rarely a minor inconvenience. It doesn’t just stay in your back. it seeps into your mornings, disrupts your sleep, and changes the way you breathe. Simple, everyday movements like bending over to tie your shoes, sitting at your desk, or lifting a grocery bag suddenly feel like monumental hurdles.
When your back hurts, your natural instinct is probably to lie down, stay perfectly still, and wait for the pain to pass. But what if waiting it out is actually making things worse?
According to modern fitness and medical fundamentals, prolonged rest is no longer the gold standard for back pain. Instead of complete inactivity, your spine craves safe, controlled, and intelligent movement.
Here is why you need to ditch the bed rest and how you can relieve back pain using six specific, science-backed movements.
The Myth of Bed Rest: Why Your Back Needs Movement
Lower back pain is currently among the leading causes of disability worldwide. Surprisingly, it isn't just affecting the elderly; young professionals in their 20s, 30s, and 40s are reporting alarming rates of stiffness, soreness, and recurring spasms.
Why? Because we live in a culture of immobility.
Hours spent hunched over desks, enduring long commutes, and staring at screens have fundamentally changed how our bodies function. Over time, this chronic lack of movement leads to poor spinal circulation, severe muscle deconditioning, tight hip flexors, and compressed discs. Ultimately, this results in pain.
Research consistently shows that prolonged bed rest actually delays back pain recovery. When you stop moving entirely, your muscles weaken further, and your joints become stiffer. To break the cycle of pain, you must introduce gentle, controlled movement that restores stability without adding unnecessary stress to your spine.
6 Movements for Rapid Lower Back Pain Relief
You don’t need vigorous stretching or intense, sweaty workouts to fix a hurting back. In fact, rehabilitation should begin in safe, supported positions. Here are the 6 foundational movements to help ease stiffness and strengthen your lower back.
1. Supine Core Activation (Abdominal Bracing)
This is the absolute foundation of most back rehabilitation programs. People with persistent lower back pain often suffer from a delayed activation of their deep stabilizing muscles. This movement wakes up those sleepy muscles to restore control to your core.
There’s more to life than simply increasing its speed.
By Udaipur Freelancer
How to do it: Lie flat on your back with your knees bent and your feet flat on the floor. Place one hand just below your navel. Take a slow, deep breath in. As you breathe out, gently tighten your lower abdominal muscles imagine you are preparing for a light cough or bracing yourself before someone taps your stomach.
The Goal: The movement should be subtle. Your pelvis and rib cage should not visibly move.
Duration: Hold this contraction for 5 to 8 seconds while breathing normally. Relax completely.
Reps: Repeat 5 to 10 times.
2. Pelvic Tilts
Once you have mastered gently activating your core, you can introduce a bit of controlled movement. Pelvic tilts improve your awareness of your spinal positioning, heavily reduce lower back stiffness, and encourage coordinated muscle activity.
How to do it: Remain in the same lying position (on your back, knees bent, feet flat). Gently tilt your pelvis backward so that you flatten the natural curve of your lower back directly into the floor.
Duration: Hold this flattened position for 5 seconds, then slowly return to a neutral spine position.
Reps: Repeat 10 to 12 times.
3. The Glute Bridge
Weak glute (buttock) muscles can drastically increase the strain placed on your lower back. The glutes are designed to support load transfer through the pelvis. By strengthening them, you reduce the daily reliance on your vulnerable lower back muscles.
How to do it: Still lying on your back with your knees bent, tighten your abdominal muscles slightly. Press through your heels and lift your hips off the floor until your body forms a straight line from your shoulders down to your knees. Avoid arching your back at the top!
Duration: Hold the top position for 5 seconds, then slowly lower your hips back to the floor.
Reps: Repeat 8 to 15 times.
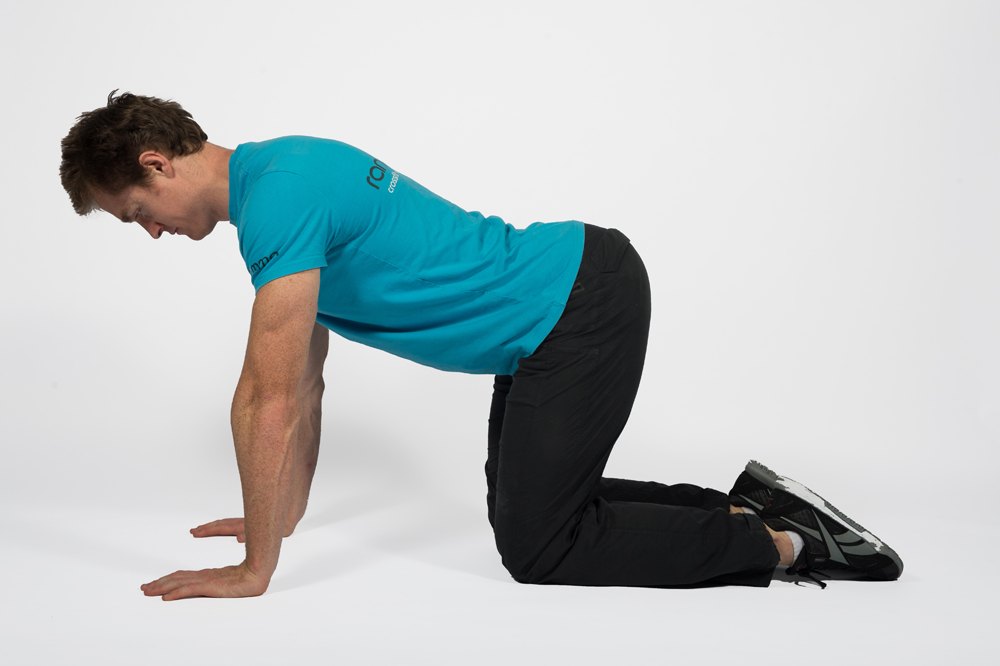
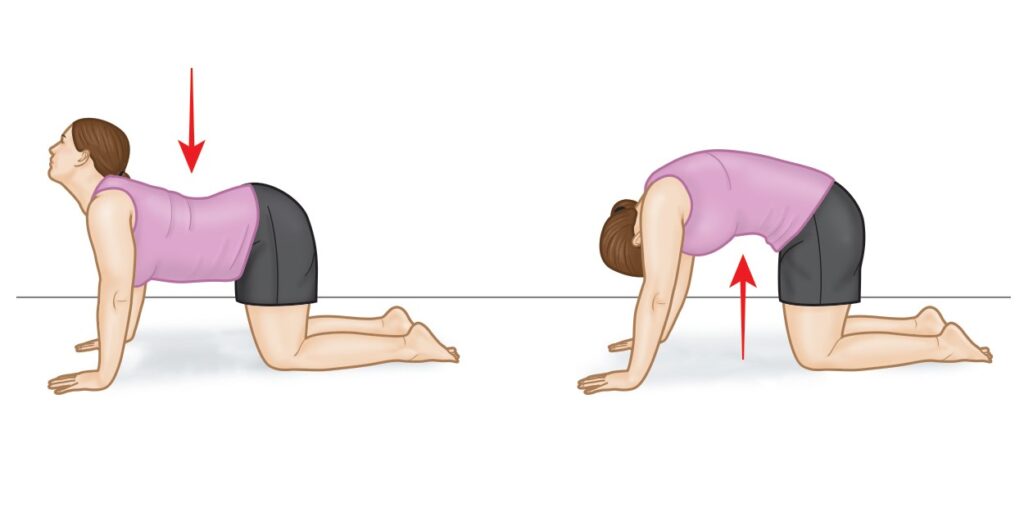
4. Cat & Camel (Cat-Cow) Mobility
Stiffness is the primary companion of back pain. The Cat & Camel movement is incredibly effective at improving spinal mobility and increasing local blood circulation without putting excessive weight or load on the spine.
How to do it: Get on your hands and knees (quadruped position). Keep your hands directly under your shoulders and knees under your hips. Slowly arch your back upward toward the ceiling like an angry cat. Then, gently reverse the motion, lowering your stomach toward the floor into a comfortable hollow shape.
The Goal: Move in a slow, controlled manner. Do not force the range of motion. If it hurts, make the movement smaller.
Reps: Perform 8 to 12 slow repetitions.
5. Bird Dog Spinal Stability
Once you have established basic control, it is time to add stability. There is strong clinical evidence suggesting that trunk stabilization exercises are highly effective in managing chronic low back pain. The Bird Dog activates deep spinal muscles while teaching your body how to coordinate movement between your arms and legs.
How to do it: Stay on your hands and knees. Keep your spine perfectly neutral (don't let your back sag). Slowly extend one leg straight backward while simultaneously extending the opposite arm straight forward.
Duration: Hold this balanced, extended position for 5 to 8 seconds. Slowly return to the starting position and switch sides.
Reps: Perform 5 to 8 repetitions per side.
6. Daily Walking
It sounds almost too simple, but walking remains one of the safest, most effective, and vastly underutilized tools for back pain recovery.
How to do it: Start with just 5 to 15 minutes of walking at a comfortable, leisurely pace.
The Goal: Walking improves whole-body blood flow, naturally reduces joint stiffness, and supports overall conditioning. As your back begins to feel better, gradually increase the duration of your walks.
Tips for a Successful Recovery
Listen to Your Body: Keep track of your progress and pay close attention to your pain levels. Mild discomfort or muscle fatigue is normal, but sharp, shooting pain is a sign to stop immediately.
Adjust as Needed: Tweak the duration, repetitions, and frequency of these exercises based entirely on your personal comfort and rate of improvement.
Consistency is Key: Doing these movements once won't magically cure your back. Make them a daily habit to combat the culture of immobility.
Waiting out back pain on the couch is a strategy of the past. Your back doesn’t need indefinite rest. it needs to be reminded of how to move safely. By incorporating these six simple movements into your daily routine, you can break the cycle of stiffness, strengthen your core, and finally find the relief you deserve.
Udaipur Freelancer delivers high-quality web, marketing, and design solutions. We focus on building impactful digital experiences that help your brand succeed in today's market.


Recommended for you
Must-See Art Exhibitions Around the World This Year
The Revival of Classical Art in a Digital Age
Breaking Down the Elements of a Masterpiece Painting
The Revival of Classical Art in a Digital Age